
How to add a Chat Bubble to your website
A quick step-by-step guide to installing the ChatPro chat bubble on top website builders (WordPress, Framer, Webflow, Shopify, Wix, Squarespace) and developer frameworks like React, Vue, Angular, and Next.js.

Andrés Olarte
Author
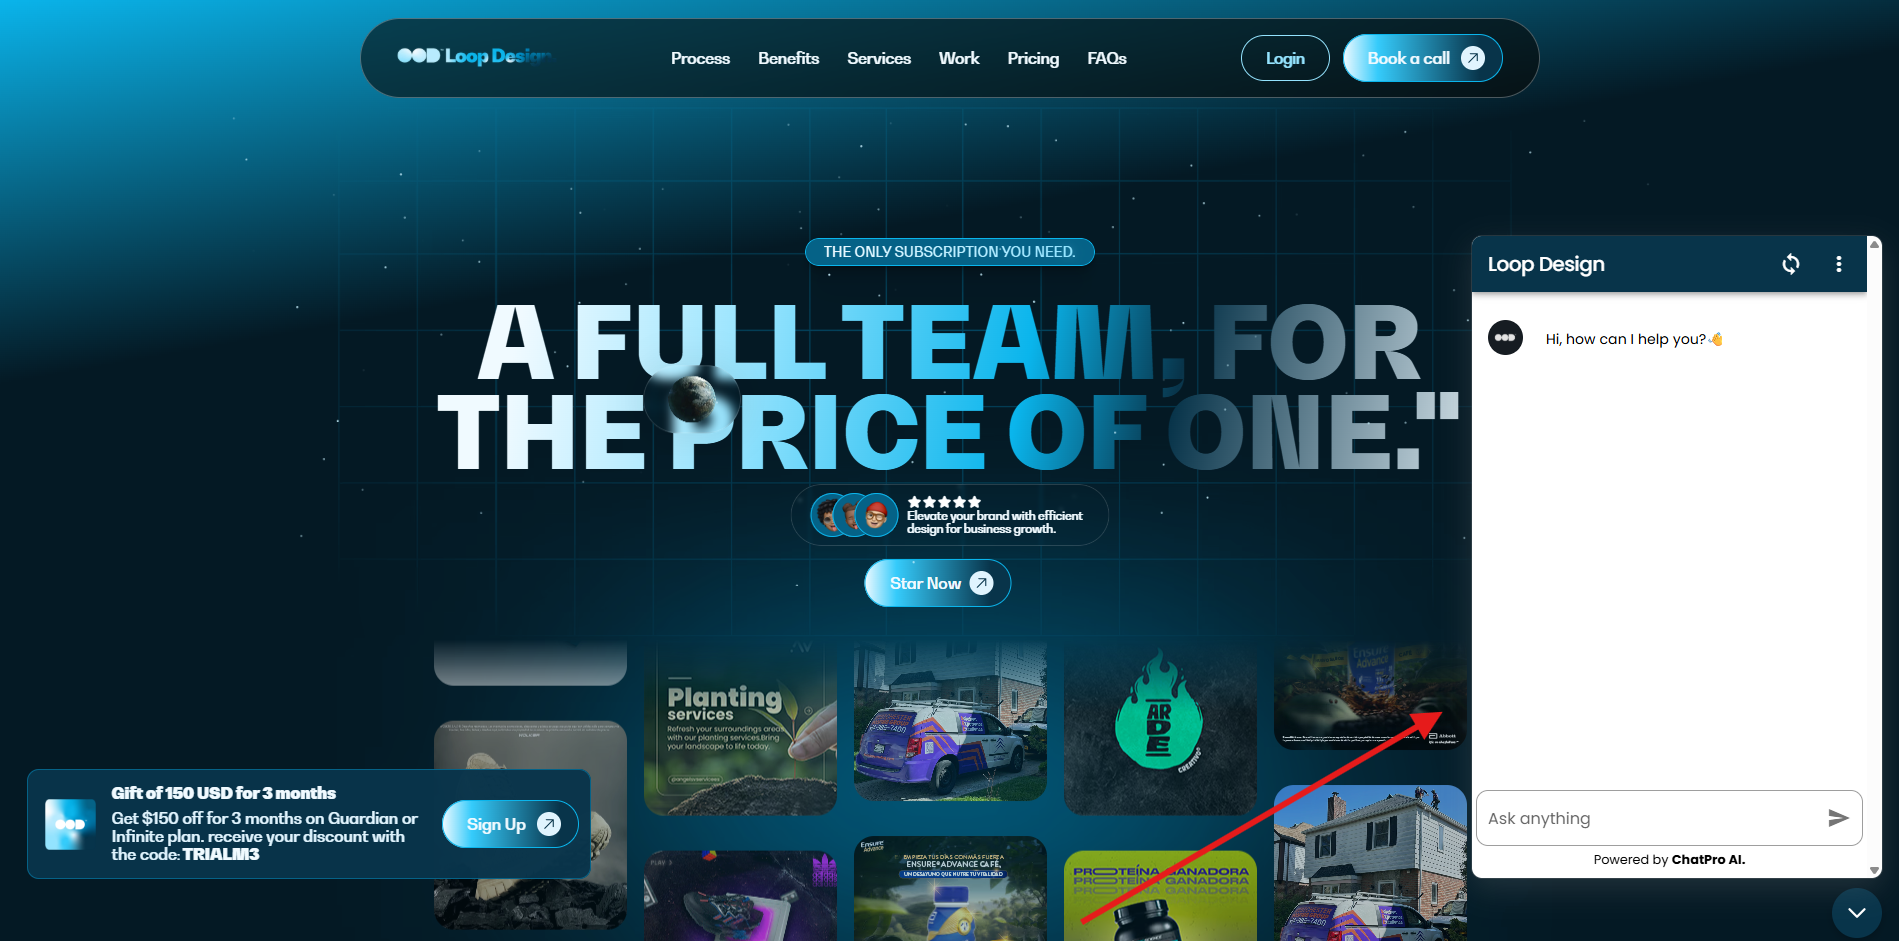
If you’re here, it’s because you want to add a chat bubble or widget to your website. This will allow your customers to interact with your Agent and get 24/7 answers to any questions or requests they might have. You’re likely looking for something like this:
Before we begin, here is how to get your personal ChatPro script snippet.
How to get your script
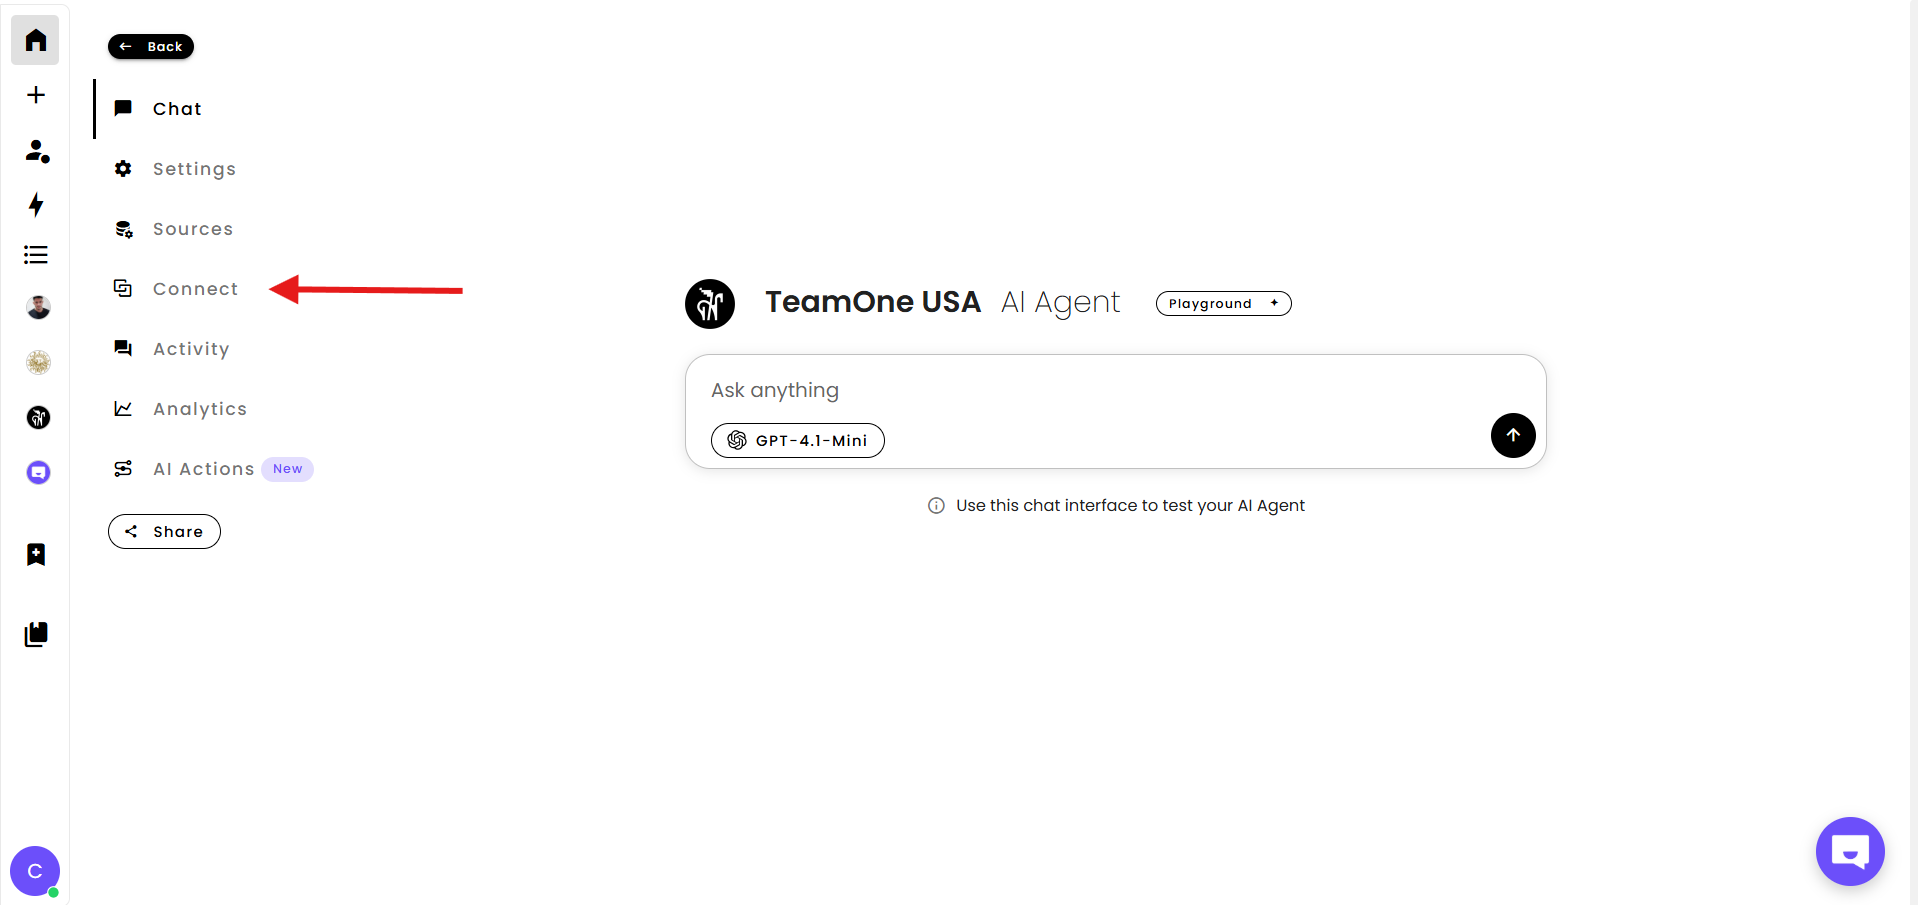
- Go to your Chatpro dashboard
- Select the agent you want to embed in your website
- Click Connect
- Choose Chat Bubble
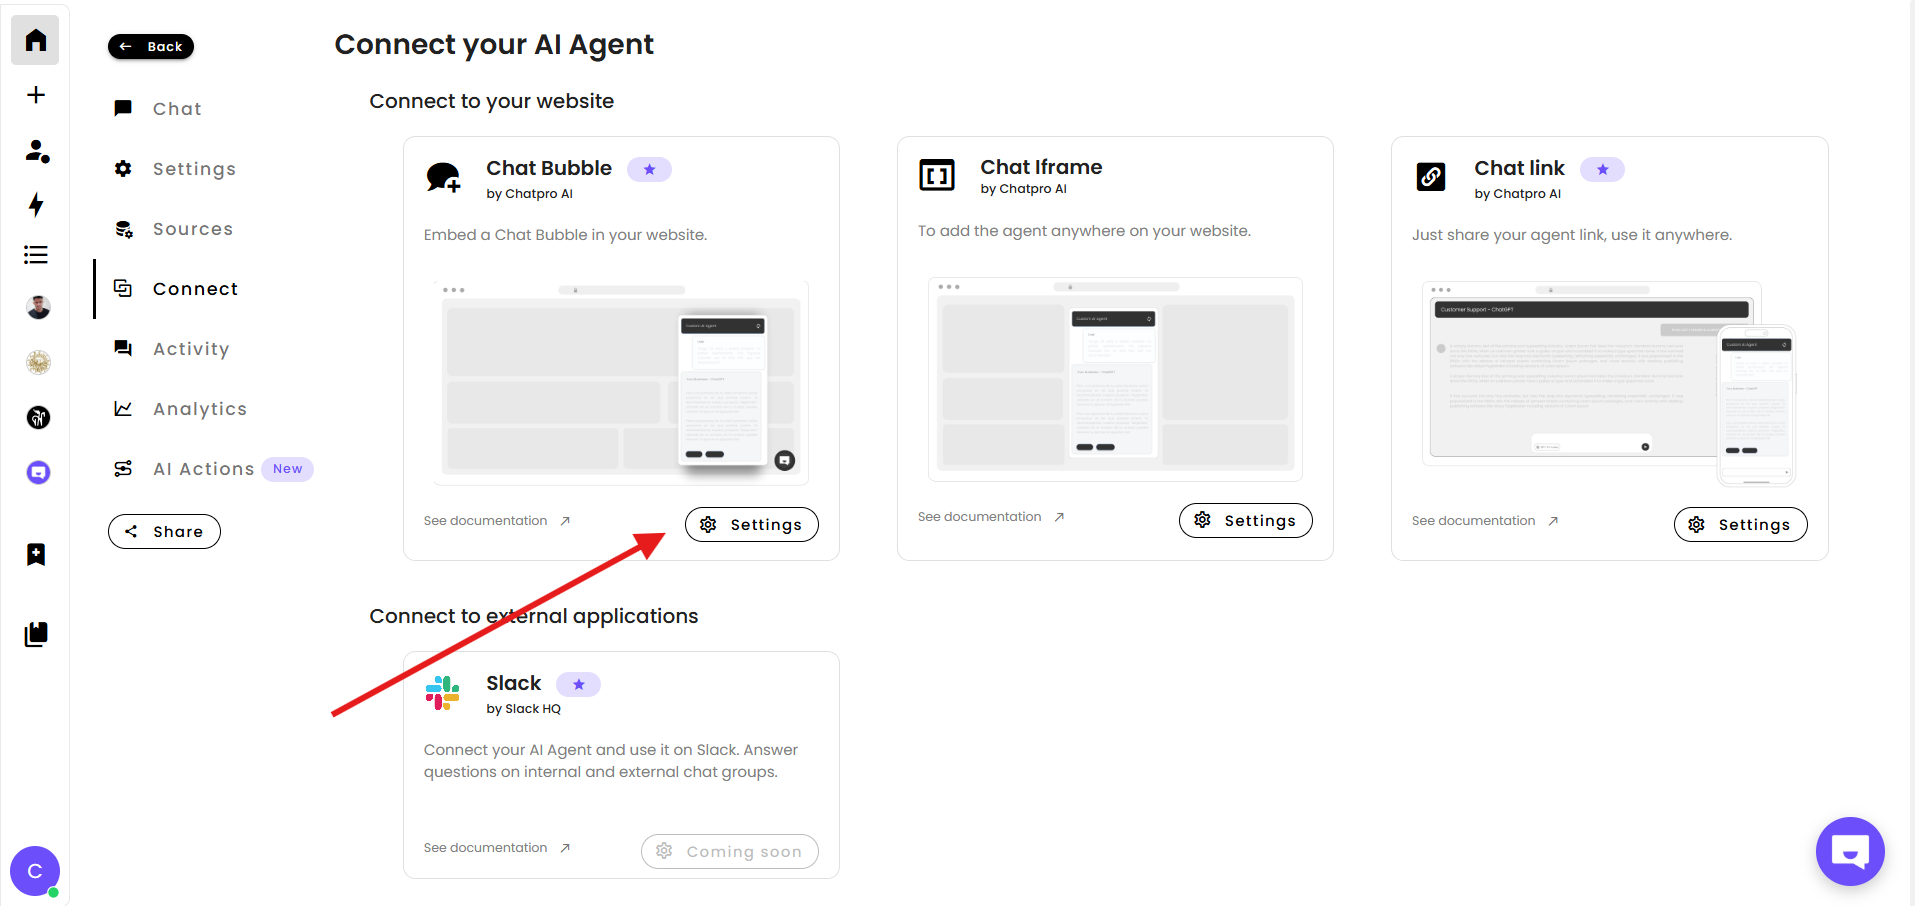
- Click on settings
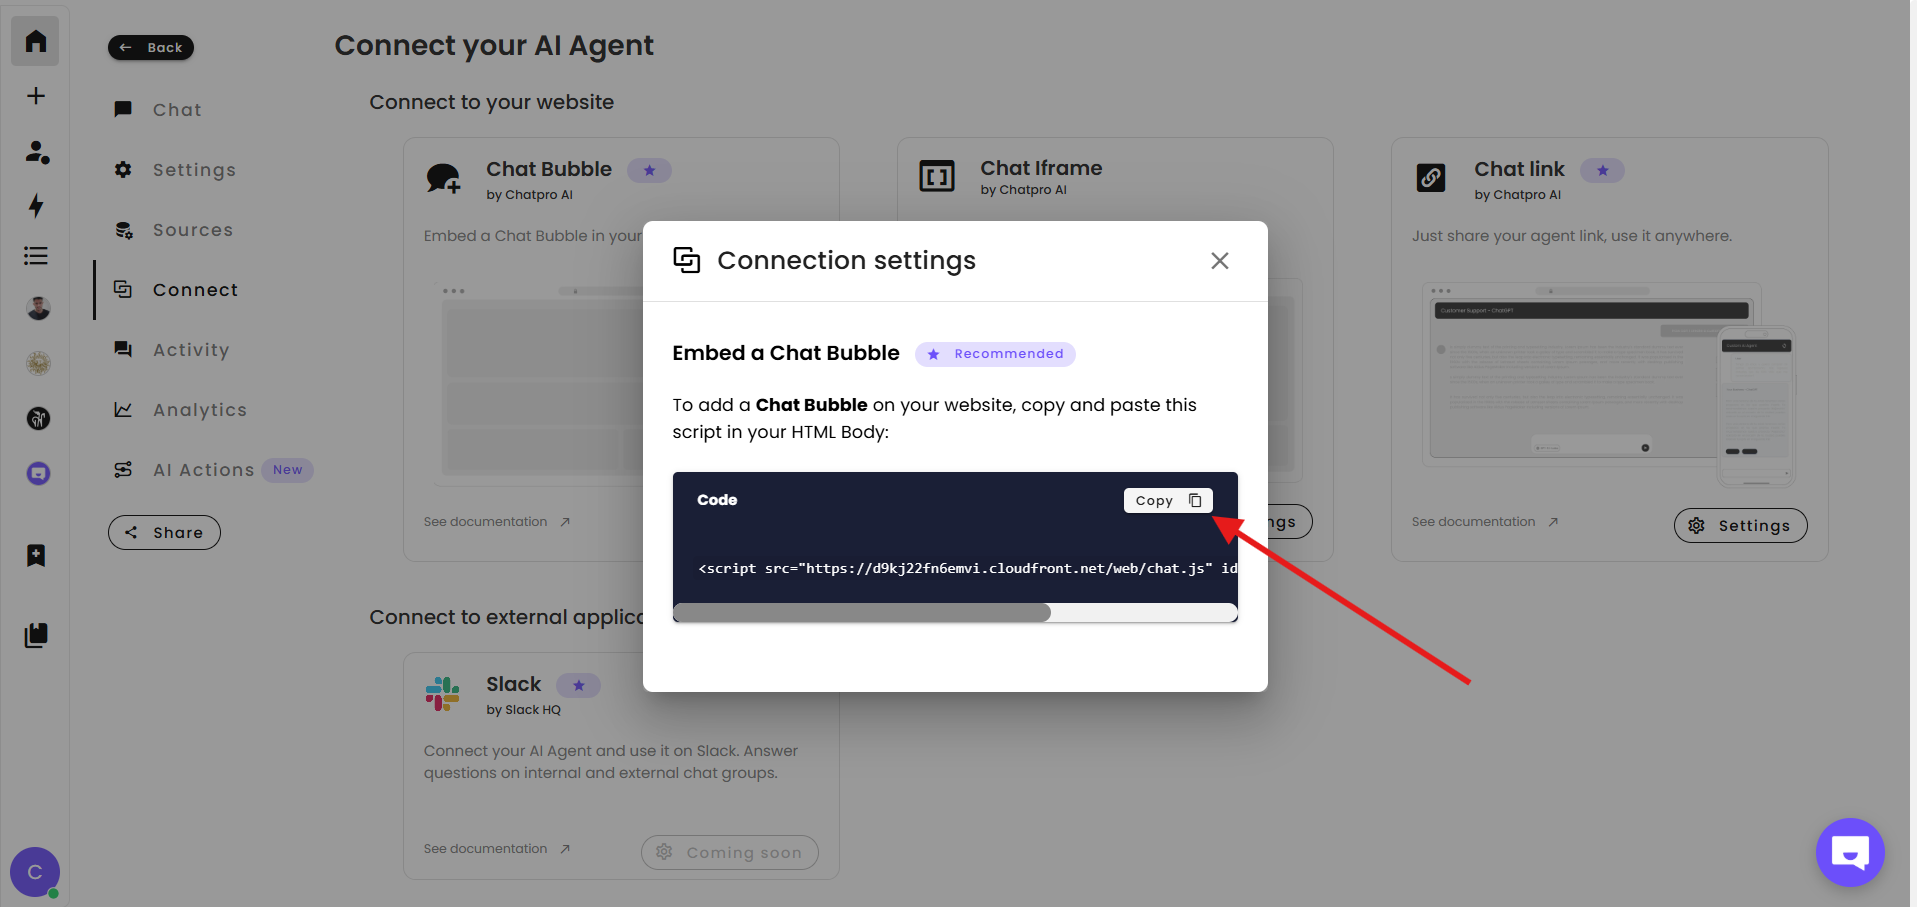
You will find a script that looks like this:
<script src="https://d9kj22fn6emvi.cloudfront.net/web/chat.js" id="YOUR_AGENT_ID"></script>
Copy it. You will paste this into your site depending on the platform.
🔓Make sure your Agent is Public.
Popular Platforms
These are the most common tools people use to build websites, so we will start here.
WordPress
Option 1: Using the “Insert Headers and Footers” plugin
- Install the WPCode plugin
- Open Code Snippets
- Go to the Header section
- Paste your script
<script src="https://d9kj22fn6emvi.cloudfront.net/web/chat.js" id="YOUR_AGENT_ID"></script>
Save and you are done. ✅
Option 2: Adding directly to your theme
Open the file header.php inside your theme and paste this inside the head tag:
<script src="https://d9kj22fn6emvi.cloudfront.net/web/chat.js" id="YOUR_AGENT_ID"></script>
Framer
- Open your Framer project
- Go to Settings and then Code
- Scroll to Custom Code
- Paste your script in the Footer Code box
Publish the site. ✅
Webflow
- Go to Project Settings
- Open Custom Code
- Paste your script in the Footer Code area
<script src="https://d9kj22fn6emvi.cloudfront.net/web/chat.js" id="YOUR_AGENT_ID"></script>
Publish the site. ✅
Wix
- Go to Settings
- Open Custom Code
- Add New Snippet
- Paste your script
- Set it to run on All Pages and choose Body end
Save and publish it. ✅
Shopify
- Open Online Store
- Go to Themes and click Edit Code
- Open layout/theme.liquid
- Just before the closing body tag, paste:
<script src="https://d9kj22fn6emvi.cloudfront.net/web/chat.js" id="YOUR_AGENT_ID"></script>
Save your changes. ✅
Squarespace
- Open Settings
- Go to Developer Tools
- Click Code Injection
- Paste the script in the Footer box
Publish and your chat bubble will appear. ✅
Ghost CMS
- Open Settings
- Go to Code Injection
- Paste the script in the Site Footer
Save and publish your Ghost site. ✅
Developer Frameworks
Now let’s look at how to install ChatPro in the most common JavaScript frameworks.
React
Option 1: Add to public/index.html
This works if you are using Create React App.
<head>
  <script src="https://d9kj22fn6emvi.cloudfront.net/web/chat.js" id="YOUR_AGENT_ID"></script>
</head>
Option 2: Load it dynamically
You can also inject the script inside a component:
import { useEffect } from "react";

export default function App() {
  useEffect(() => {
    const script = document.createElement("script");
    script.src = "https://d9kj22fn6emvi.cloudfront.net/web/chat.js";
    script.id = "YOUR_AGENT_ID";
    document.body.appendChild(script);
  }, []);

  return null;
}
Next.js
App Router (Next 13+)
Add this inside app/layout.js:
import Script from "next/script";

export default function RootLayout({ children }) {
  return (
    <html lang="en">
      <body>
        {children}
        <script src="https://d9kj22fn6emvi.cloudfront.net/web/chat.js"
          id="YOUR_AGENT_ID"
          strategy="afterInteractive"
        />
      </body>
    </html>
  );
}
Pages Router
Add this to pages/_document.js:
<Head>
  <script src="https://d9kj22fn6emvi.cloudfront.net/web/chat.js"
    id="YOUR_AGENT_ID"
    ></script>
</Head>
Vue.js
Add to public/index.html
<head>
  <script src="https://d9kj22fn6emvi.cloudfront.net/web/chat.js" id="YOUR_AGENT_ID"></script>
</head>
Or load inside a component
export default {
  mounted() {
    const script = document.createElement("script");
    script.src = "https://d9kj22fn6emvi.cloudfront.net/web/chat.js";
    script.id = "YOUR_AGENT_ID";
    document.body.appendChild(script);
  }
};
Angular
Option 1: Add to angular.json
Open angular.json and add inside the scripts array:
"scripts": [
  "https://d9kj22fn6emvi.cloudfront.net/web/chat.js"
]
Then place the id in your index.html:
<script id="YOUR_AGENT_ID"></script>
Option 2: Add directly to index.html
<script src="https://d9kj22fn6emvi.cloudfront.net/web/chat.js" id="YOUR_AGENT_ID"></script>
Plain HTML Sites
Simply paste the script in your head or just before the closing body tag.
<script src="https://d9kj22fn6emvi.cloudfront.net/web/chat.js" id="YOUR_AGENT_ID"></script>
Your Chatpro AI chat bubble is now live 🎉
Share this article
Build AI agents for Free using ChatPro
Connect your data, get a custom AI Agent, and share it anywhere.
- - Embed on your website
- - AI Chat and Voice

Keep Reading
How to Integrate Typeform with ChatPro AI Agents (Step-by-Step Guide)
Learn how to integrate Typeform with ChatPro AI Agents in minutes. Automatically collect feedback, surveys, and form responses inside AI-powered conversations.

How to Integrate Tally Forms with ChatPro AI Agents (Step-by-Step Guide)
Learn how to integrate Tally Forms with ChatPro AI in seconds. Collect user data, feedback, and surveys automatically using AI-powered agents and smart form triggers.
How to Integrate Calendly with Chatpro AI for Automated Appointment Schedulin
Learn how to integrate Calendly with Chatpro AI step by step to automate meeting scheduling with AI agents. Improve conversions, reduce friction, and book meetings directly from conversations.
How to Add AI-Powered Appointment Scheduling to Your Agent (Cal.com)
Learn how to add AI-powered appointment scheduling to your chatbot. Step-by-step guide to automate meeting, demo, and call bookings using AI agents and Cal.com.